This project consist of a custom developed advertising stand for a local fair. The original idea was developed by a creative graphic designer and he delegated to me the technical aspects of the project. I count among my hobbies to play with Arduino and Raspberry Pi and I am always up to work close to the hardware.
Key Features
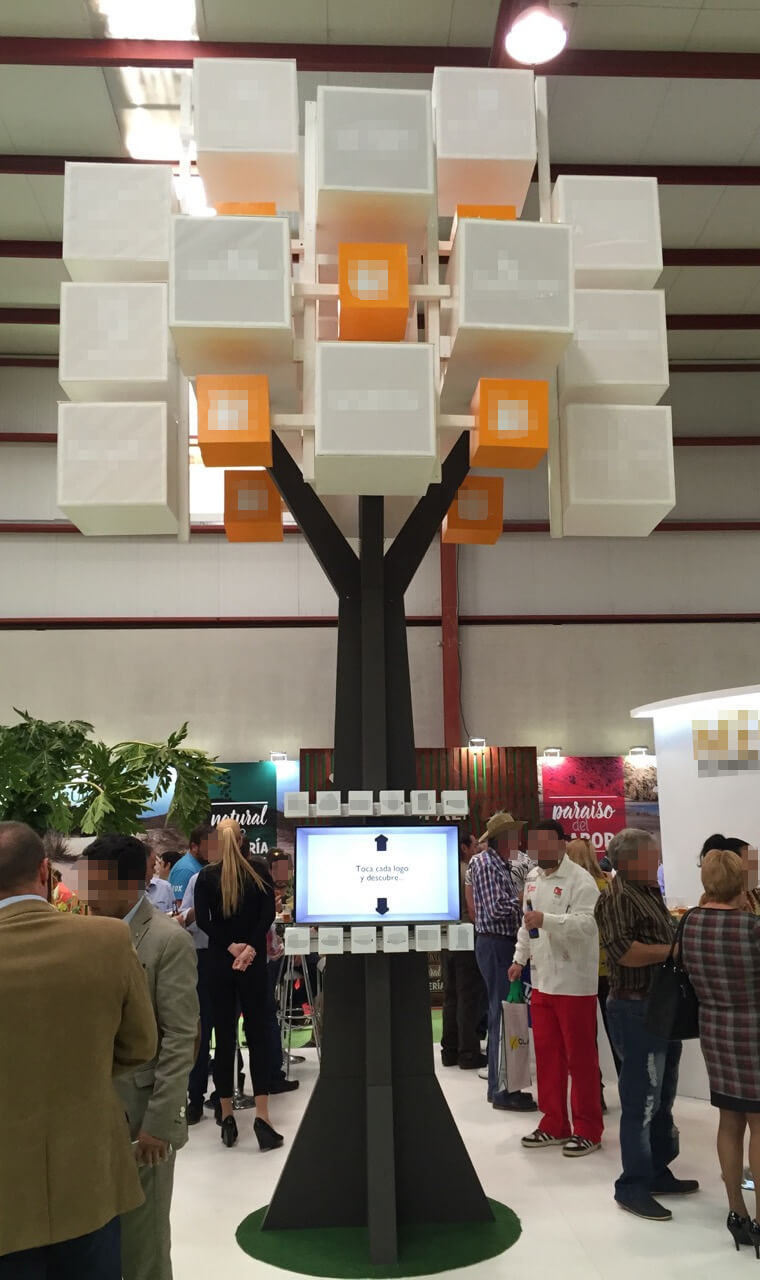
The taller, the better. The advertising stand must be seen anywhere in the fair and invite people to interact with it to get more information. The proposed design was:
- The leafs are boxes illuminated with the brand logo on the side.
- The trunk is a huge television screen where the information is shown and the media played.
- A set of interactive pannels or buttons around the television/trunk with the brands on the side.
Concept
There are some technical challenges to implement the desired experience, so it is interesting to enumerate the requirements and defined the components of the tree to identify the roadmap. The specifications are:
- The display should invite you to touch the panels in the standby mode. A video should loop calling the fair visitor to come and play.
- When someone touches a button, it must turn on its branded leaf-box and play the information video on the screen. It must also turn off the last illuminated leaf-box if there is one.
- There must be a safety margin between valid interactions in order to avoid changing videos repeatedly in short intervals.
- When the informational video is finished, the leaf-box must be turned off and the screen must come back to the standby mode.
- It must have an automatic mode, so if it is a long time without interactions it will start to illuminate the leaf-boxes and play informative videos automatically.
- The components used must fit the budget of the project since the tree is one more element of the stand and should not spend all the resources.
- The main components and boards must be redundant for the sake of availability.
From a technical point of view, we iterated the specifications and propose the following implementation:
- A custom made wooden structure with boxes with the brands. This component requires carpentry and marketing work so we are not going to talk much here.
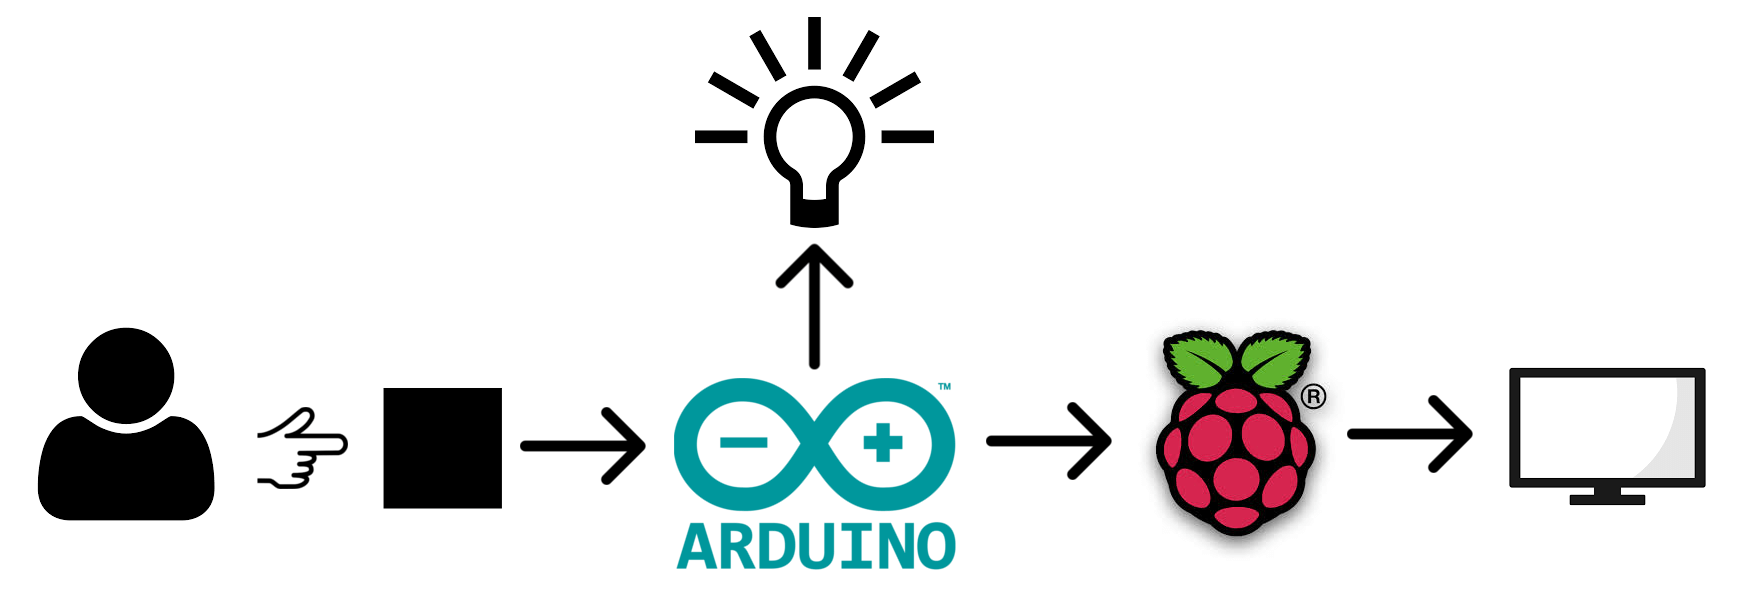
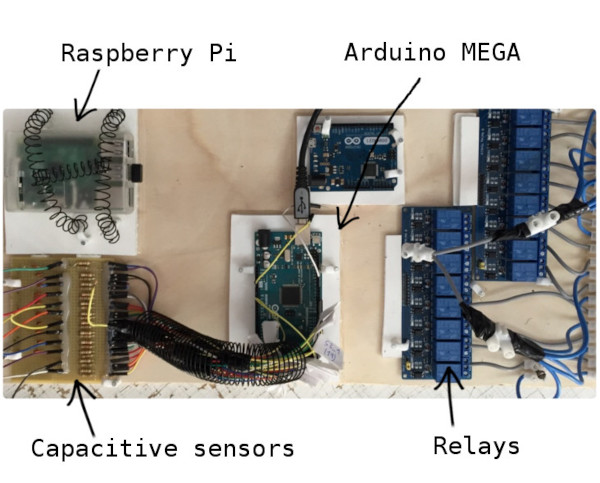
- A set of relays connected on one side to the powerful bulbs and an AC power supply, and on the other side to an Arduino board that will be the controller of the relay.
- Several touch panels connected to an Arduino board that will monitor the input.
- A large full HD television screen connected by HDMI to a Raspberry Pi board that will play the videos.
Implementation
The Board
The Arduino board chosen as the controller was the MEGA version because the amount of digital inputs and outputs, this board has 54. I had already some Arduinos Uno and Leonardo at home so I was able to do experiments and demo the project things.
The chosen Raspberry Pi model was the Model B. This choice was just because I had some of them already and it met our requirements.
The prototype board was small enough to fit inside the ‘roots’ of the tree.
Touch Panels
I used capacitive sensors that are well tested and proven. This component consists of a few resistors, capacitors, conductive material, and some tin. You can find more information about how it works at the official Arduino website.

I used an open source library for the integration. For example, to define a sensor and read its input:
| |
Turn On The Light
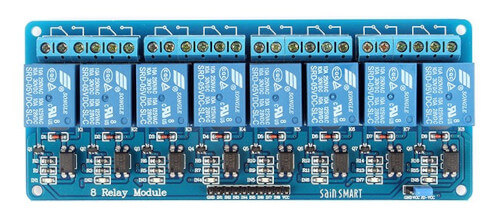
I used two eight channel DC 5V relay module to control the light at the high voltage circuit (220V). These relays are very common and reliable.
On the Arduino side, it was only necessary to control the output of a digital pin per relay. For example, to turn on the light of selectedBrand:
| |
From Arduino To Raspberry Pi
The communication between both platforms was done via a USB connection. When the Arduino turn on a leaf-box, it must send an order to the serial port. The Raspberry Pi must be listening and reading this port in a loop to process all the video playback orders that it receives.
For example, to send the order to play the information video of the brand with the ID 1.
| |
| |
Information Videos
The Raspberry Pi application that plays the information videos by following the input of the Arduino was written in Python. I used the pyomxplayer player that it is a Python wrapper of omxplayer.
For example, to play the information video of the brand with the ID 1:
| |
Conclusion
The execution of this project was successful. Both the customer and my designer workmate were happy. Jobs involving software and hardware are very entertaining challenges to perform. I am delighted to work with Arduino and Raspberry Pi boards and I will do it again as soon as I have a chance.